Jul 31, 2015

Pegboard Makeover - With Custom 3D Printed Hooks

When I made a custom pegboard holder for pliers and cutters, I knew I was onto something different. It became the project which finally became my easy answer to the oft asked question:

"Yeah, but have you 3D Printed anything USEFUL yet?"

Yes - These PegBoard Tool Holders are useful - so after making some simple additional tool holders, I've taken it to the next level.
Now, my whole pegboard is getting a makeover. Not only do my 3D Printed hooks and holders solve the most annoying problem with traditional metal hooks, they can also be made in custom configurations to hold my specific tools!

Old hooks and plastic holders

The Problem


First - traditional pegboard hooks and holders do not stay in place very well. Every time I'd remove a tool, the hook would come with it, falling to the floor or workbench. Sure, I've used those plastic thinger-ma-bobs to help hold them in place, but those take up two adjacent pegboard holes and make it impossible to move the hooks easily. With glass 3D Printer beds directly under my tool wall now, a falling metal hook could be more than an inconvenience. While I could have 3D Printed little plugs to secure the metal hooks better - there was another problem I wanted to solve (read on).

Second - I have many tools which simply don't fit into the generic hooks and holders that I can buy at Home Depot. My small screwdrivers, my rogue allen keys, and even my hairspray cans (yes - you know you have them too - and if you don't you might want to) and glue, and other random tools. I wanted every tool to have a perfect place - or at least SOME place to go off my workbench surface.

The custom hairspray can holder! #3dprinters paradise.

The Solution(s)


I came up with two general approaches.

The first was a single piece hook which easily printed flat on the bed and could be easily modeled to be different shapes (curved hooks, straight hooks, hooks with multiple sections) and sizes (long, short, uh.... medium).

The second approach allowed me to create more complex holders, shelves and multi-tool configurations. It was two separate parts. The mount which stuck into the pegboard is printed on it's side and is always the same - a generic mounting clip. The second part is the customized tool holder which hooks securely into the mount. That part is printed upside-down, with the mount connectors sticking straight up from the bed - which prints beautifully.
Rogue Allen Keys on the wall now!

I outlined the early version of that second multi-part tool holder in a prior post, but have since improved the model to make the connection between the wall clip and the tool holder much more stable.

The Collection So Far


I've now got a variety of pegboard hooks and holders. They are separated into two sets - Hooks and Holders - and you can find a link to the models at the bottom of this post.
Some custom Hook styles

Angled hook
Good for practically any simple hanging tool which has a hole for hanging. Angle keeps things from slipping off.

Lipped hook - short, medium and long
Useful for most things, with the different sizes for different depths of hanging objects. For example, the long version works great for a roll of blue tape or, if used in pairs, for a couple of small hammers.

Curved hook - 50mm and 66mm 
These were special made for cans of hairspray, where two of these spaced apart by 4-5 inches works perfectly. I have two sizes for the two different hairsprays I'm using (for getting things to stick to the print bed, not for my hair).

Mounting Clip
This is the key part that is used to hold any of the multi-tool, more complex holders below.

Pliers and Clippers holder
The custom tool holders all fit the same wall clip
This holds two pair of small pliers or clippers. This was my first solution which inspired the rest.

Allen Key and small screw-driver holders
These hold multiple Allen Keys or a few small screw drivers - with about 6-14 holes of varying sizes from 3mm to 8mm. I've made a several configurations of these.

Screw Driver holder
These are used for small screw drivers only so far - I've got a larger version in the works.

Clam-knife holder
This was special made for the clam knife that came with my LulzBot TAZ4 - and I made it a bit more versatile for multiple similar tools.

Next Steps


I've got plans to keep growing this collection - especially for wider holders which can easily be made to use two clips for stable heavy tool holding. The designs are actually fun to make and most importantly, they expand my ability to justify my 3D Printing habit as something USEFUL. ;)

Got some ideas on how to expand the collection? Share them please - maybe I'll model it and add it so you can print it!

The Models


I'm posting all these original designs as .STL files on Pinshape. Feel free to use them - and please refer back to this post if people ask where you got them!
Holders

Jul 19, 2015

Make it Personal - 3D Printing Text

One of the fun and practical aspects of 3D Printing is the personalization that you can achieve with objects - like adding names, initials or other words to objects to make them unique. Doing this requires rendering text - letters, numbers and symbols - as parts of 3D objects. I recently did a post about some name tag designs which inspired me to collect some experiences about text objects.

Making Text Objects


The 3D Modeling software/app you're using will either help you or hinder you from making great text objects. Most 3D modeling Apps have some sort of text object which allows you to create what you need and then change it's font, size, weight and style to get the look you want. There are so many 3D modeling apps available today, but here are how a few of the ones I know stack up in terms of their text rending.

Autodesk 123D Design is my current favorite modeling app. It has a text object which allows you to select the font from a long list of about 174 fonts (!),  but not all of these actually render (probably due to fonts installed locally and typical licensing issues with traditional fonts). Even if you do find a font you think is cool, remember that they're not all appropriate for extruding into 3D objects. In 123D Design, you first generate a shape and then you extrude that text into actual objects. I found some issues in 123D Design with the "Bold" style of several fonts - it simply will not extrude certain characters into an object - specifically the "@" symbol gave me issues with a font like Futura (bold). But notice that most of my favorite fonts for 3D Modeling are bold - this just helps avoid letter parts which are too thin for good printing. Note that 123D Design also has a great iPad app, but there doesn't seem to be any text support as of this writing.

TinkerCad is a great option for kids and beginners and only requires a modern web browser like Google Chrome. It has a whole category of 3D capital letter objects, popular symbols and numeric digit objects ready to go, which you add to your model one character at a time. But it also has a more generic "Text" object which allows entry of any text, selection of font (from a list of only 6 for now), weight and size. It's not a huge selection by any means, but definitely useful. Find the text option under the right panel object selector called "Shape Generators".

Sketchup is another great, and arguably much more professional, 3D Modeling app - locally installed on Mac and Windows computers. It has around 200 fonts with many different weights to chose from. I don't use this product on a regular basis, but if you really want some professional features or hope to continually increase your 3D Modeling skills, give it a try.

3Dtin is another web-based modeling product used inside a browser. It has only 3 fonts to choose from, and they let you make letters in positive or negative form as soon as you create them.

Morphi is an iPad app which does have some text support, but you have to upgrade the free version for $2.99 to get the full alphabet. There's only one font - basically fully rendered upper and lower case letters - but if you're modeling on the iPad there are not as many options, and this is a great app (which also supports freeform drawing to create objects once you upgrade to the paid version).

Font Suggestions


Some fonts that I found work really well in many cases are the following:
(in Autodesk 123D Design - which is my go-to modeling product. You may find others in the other apps mentioned above or in your 3D Modeling app)

  Arial (bold),   Futura (bold),   Gill Sans (bold),
  Gurmukhi MN (bold),   HeadLineA (bold),   Impact,
  Iowan Old Style (bold),   Kannada MN (bold),   PT Sans Caption (bold),
  PT Sans Narrow (bold),   Seravek (bold),   Trebuchet MS (bold),
  Verdana (bold).

Optimizing Your Text

Baskerville font - thin parts

Things to consider when picking a font include the letter thickness and the complexity of the shape - and it helps to actually extrude the text into objects to look for potential problems. The two main problems that exist are letter segments which are too thin, and orphaned parts.

The example shown here is a font called Baskerville. It's a beautiful classic serif font, but you can see that the width of several parts are extremely thin, so at small sizes, the printing might be too fragile or just not print well at all. Only use fonts like this in bold or larger sizes. When printing in small sizes, I highly recommend avoiding serifs and other complex, thin parts to the letters - and even in big sizes, these details will increase the print time significantly.

The other problem shown uses the lower case "i" and "j" which both are dotted letters and therefore result in what I call "Letter Islands" - that is the dots themselves are not connected in any way to the letter. To use these letters, you can use some tactics I describe later in this post.

Positive or Negative


With designs which have text, you have basically two high level options in your designs. Positive text is just rendering the letters as objects themselves, or where the outer perimeter of the letters is raised out of another objects surface. Negative text is where the letters are pushed INTO another object - whether completely through, like a stencil, or just partially, like being carved or stamped into the other object.

I used a negative design exclusively in one of my prior projects (Alpha-lets) which had one letter at a time stamped out of individual links (to make name bracelets). That worked really well, but was a lot of work to resolve and reconnect all the "orphaned parts" (letter islands) for every letter with a circular pattern - letter "O" being the most obvious, but a problem which exists in 7 of the capital letters in the english alphabet.

My Name Tag project used a positive design and employed a "foundation" to hold all the characters together as one part.
To make a foundation, you simply create a long rectangle or other shape part which stretches to touch at least one part of every character in the design. I used a rectangle at the bottom of the letters in several cases, but you can see I also used the Twitter Bird in one of the designs to be the foundation for the letters. This can be an area of great creativity, where you can make the functional element of the foundation become a style element of the design itself.

When extruding your positive text, you might be tempted to make the letters higher than they ought to be. I would start not too high, and only use very high letters if the design simply looks amazing with that style. In most cases, the text becomes less legible, since you can't see the outline of the letter as well from the side.

Letter Islands

Connector holding the Letter Island
in the middle of the @ symbol

One important complication that arises much more with negative designs than positive is the "orphaned" bits - those parts which are no longer attached to anything to become part of the object. I call these "Letter Islands". In positive designs, the dots on the lower case "i" or "j" are the only letter islands. In negative designs, you get letter islands with every circular letter and others - the inside of the "A", "B", "D", "O", "P", "Q", and "R" all have this issue, and that's just the capital letters. Depending on the font you select, you might experience even more of these issues due to loops that are part of the style of the font (think of the script "L").

I used a couple of solutions for letter islands. First, I would create small connectors - bridges - and simply connect the bridges to the other parts of the letters in places which seemed natural. This gave the look of a stencil to the negative letters in my Alpha-lets project. Second, and much easier, I would simply create a base on which to place all the letter parts so that they rise out of a platform. That was a much simpler approach that even a beginner can do with practically no effort. This is a motivating first project for kids!

Summary


Use text! It makes your designs interesting, unique and personal. Kids in particular love to see their name or nickname turned into a real object they can wear on their backpack or keychain, and even adults really become more interested in how they might use 3D Printing when they see the impact of a custom logo or personalized product. The simplest way to get started is to choose a great font, like Impact, then simply mount all your letters on a solid background "foundation" to avoid the issues of letter islands - and then try something more complex.

Jul 18, 2015

5 Name Tag designs for 3D Printing

One key benefit of 3D Printing is the ability to create custom designs aimed at a specific purpose or even a specific person. In traditional manufacturing, it's hard to get small quantities in the color and size you want, and even harder if you require more personalization - like your own name or logo or message as part of the product. This is where 3D Printing shines in comparison to traditional methods.

I wanted to get more experience working with 3D modeled text and to play around with some designs that I could offer to friends and colleagues - something more personal and unique to them. I decided to create some simple name tags - using my Twitter handle as the name.

The Big Curved Bird
I created 5 designs to start - but I could see getting carried away quickly with dozens of additional designs. These designs are mostly twitter oriented - and even with that constraint, there are so many small alterations which can be made to make additional unique designs.

The key feature of all these designs are that they must have a hole for a keychain loop. That's the only intended use so far, although small alterations could easily make these magnetic or pin ready.

Autodesk 123D design (still my main 3D Modeling app) has a text object which allows you to pick the font from a long list of about 174 fonts (!)... BUT... Not all of these actually render. I took some time to pick a few which have enough weight/thickness  and less detail (eg serifs) so they print well at small sizes.I'll definitely follow this post up with one solely focused on tips for working with text when 3D Modeling.

You can see all 5 designs in the pictures included here. The Big Curved Bird design was definitely the toughest of the bunch to get right, simply because I had to rotate each character individually. But overall, each of these was pretty simple to create. I expect to tweak these designs a bit and come up with new ones as I create some for my friends - so I'll post a new set of designs. Comment here if you have design ideas you think I should try (or pictures of your own designs!).

The Big "@"
The Right Bird

The Negative @Bird

The Basic Twitter Handle

Jul 9, 2015

The Polar3D 3D Printer - Very Impressive

I discovered the Polar3D 3D Printer at the ISTE Education Conference in Philadelphia last week, where many 3D printer companies attempt to capture educator attention right along side other education technology products. When I saw this printer - 15 of them in fact, all cranking away printing models - I immediately knew it was different and that I needed to try it.

The small footprint, unique radial bed design and apparent simplicity of the technology is what attracted me. The two passionate and experienced engineers who invented this product, who were also running their own booth and answering questions, also got my attention. The web-based printer command center put me over the edge.

Setting it up

From un-boxing to printing took me about 20 minutes. I was being careful and slow, but the one page description which came with the printer - while brief - was pretty much all I needed to get this simple printer into action.
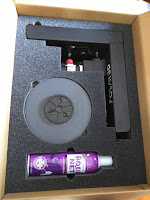
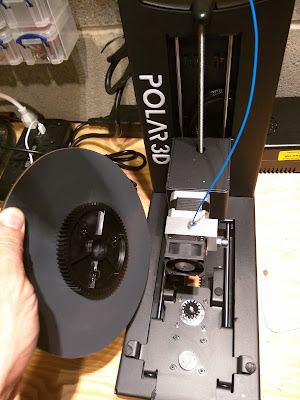
The hardware setup was ridiculously simple. This printer is basically two parts in the box, not counting the power cord and the (almost hysterically funny) cannister of hairspray which is included. Hardware setup was one step (not counting again the plugging in of the cord). The print bed - a round piece of mirrored glass with a big gear on the bottom, just sets into place to fit with the gear on the printer. That, it turns out, is the genius behind this printer's radial design - which overall reduces the moving parts and belts and other things that could go wrong.

Getting the WiFi connection set up was also simple, but to be fair,  might be harder for people who have not done something like this before. Basically it was a matter of connecting my computer to the printer's WiFi signal, then telling the printer about my home WiFi so it could connect itself - then reconnecting my computer to my normal WiFi. Alternatively, I could have connected my computer to the printer directly via ethernet.

The Hardware

The Polar 3D is small and sturdy. It measures just 8 inches wide, 15 inches high and needs approximately 15 to 21.25 inches of depth (12.75" base + 2.25" for the bed movement forward and another 6.25" for the filament spool holder, which is optional). This especially narrow footprint achieves a build volume of 8 inches in diameter by 6 inches high. The radial movement design is what accounts for this rather generous build volume in that small footprint, as the extruder only has to travel the radius of the circular bed - meaning the bed spins as it moves back and forth on the y axis - rather than the whole distance of the y or x axis.
Full specs can be found at the Polar3D website.

The printer is strong and weighty enough in a good way without being too heavy. It is practically all metal, except for a plastic molded handle insert which makes it comfortable to carry. That handle and the small physical size makes it basically mobile, and I wouldn't hesitate to take this printer with me to a school or to the office or even a friends house to show it off and print stuff for a few hours.

Some additional nice hardware features include the built-in micro-camera, which lets you watch your prints live, the easy to remove/clean circular bed, which is by far the simplest design I've seen yet, and the incredibly simple extruder design, which makes loading filament easy. That extruder design lets you use multiple filament types such as Ninja-Flex in the single extruder (by the companies claims only so far - I have not tested this). These are not actually small things - they could be huge differentiators if they all pan out to be working as expected.

The built-in Raspberry Pi micro-controller provides strong performance, connectivity, on-board model storage (16Gb, with about 8Gb avail for models) and more. There are also several connectivity ports, including Ethernet, USB Serial port and a USB Thumb drive port for direct access to stored model files. The printer also includes WiFi - it emits a WiFi signal to gain initial connectivity where you configure it to connect to your local home or school network. This is how I have used this printer thus far with practically zero issues (one time it disconnected and had to be reconnected).

The Software (Web Services)

The Polar3D is more than just a printer. It is a set of very powerful software products and services which have actually made the experience of using the printer an absolute delight. All their software is either installed on the printer directly or available through the web-based cloud services. With my beloved Lulzbot TAZ4, I still use an SD card to run models back and forth between my Mac and the printer for printing, or I connect my Mac directly to the printer. With the Polar3D, I do everything through the web - sending my models for printing directly to the printer. This will be how things are done much more broadly, I am sure.

The Printer Control Panel. 

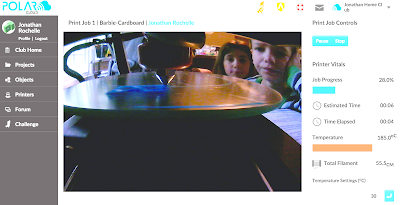
The built-in camera lets me see the print live in progress,
and see the kids watching it ;)
Polar3D provides a cloud service where you can connect, and control, your printer and even multiple printers. I'm interested to know how to get non-Polar3D printers connected now that I've used and learned to love this part of their offering. I saw the founders control their 15 running printers from their Polar3D cloud interface at the ISTE conference where I met them - and it was incredible and useful.

Since each printer also has a camera onboard, you can see the progress of every print live from anywhere you can gain web connectivity. To go one step further, every print job run is saved in the printer's history - so you can see information about all the prior print jobs, and - wait for it - you can watch a time lapse" video of any prior print which is automatically saved! I can also see the configuration settings from that history and download the STL among many other options. #mindblown

The control panel is one of the most impressive aspects of this company's software offering - and I was initially sure that it was a turn-key provided by another vendor, but it's all theirs. That Web-based (Multi!)printer control panel seems like something that quickly needs to become a service offered separately from the physical purchase of their printers - similar in a way to what MakerBot did with Thingiverse.

Clubs, Objects, Projects and more

The capabilities to organize objects and projects online, through a web-based interface, are also extensive in the Polar3D cloud service. They offer Clubs, Objects, Projects, Collections and more.

Clubs give you the ability to virtually have your own object sharing service which you can manage while inviting others to participate or co-manage. I can see this being used effectively in schools, tech clubs, maker-spaces and more.

Objects (3D Models) can be uploaded and shared through the Polar3D service and the common "favorite" count and "collect" count lets you see how popular they are.

Projects provide educators a place to describe lessons related to 3D Printing, allowing uploads of supportive materials like documents and images. This is a much more general capability than something tied to 3D Printing specifically.

Collections and subjects allow another level of managing and organizing objects. There are public collections and club-based / private collections.

I haven't used all these capabilities enough yet to give a detailed review or critique, but I'm excited about the abilities to both organize and even "white-label" my own collection of objects for both managing and sharing. I'll write more on this later for sure.

The Slicer.

Polar3D integrated the CURA open-source slicer into the printer so that you just feed it objects (.STL files) and it slices and dices (I mean, prints) the object directly. You can get into the CURA settings if you want to, but the point for some people will be that you shouldn't have to. I've found my early simple prints to be really good on the default settings, with minor issues only when I tried to do things like remove supports on a print which really did need some. The interface to the CURA settings is certainly different than CURA itself, but it was easy to find my way around - with tabs for Quick Start, Basic, Advanced and Start/End Gcode.

The Modeler (?).

Yes - there is even a modeling capability built into the Polar3D software stack. That said, I don't use it and didn't really go beyond building a simple stack of shapes. Nor did I try to print anything made in it. I don't see the need for this, but it's potentially useful to have it in cases where you just need a simple model or adjustment in a pinch and forgot your password to TinkerCad or 123D Design ;) (I use the latter and see no reason to change that).

The results

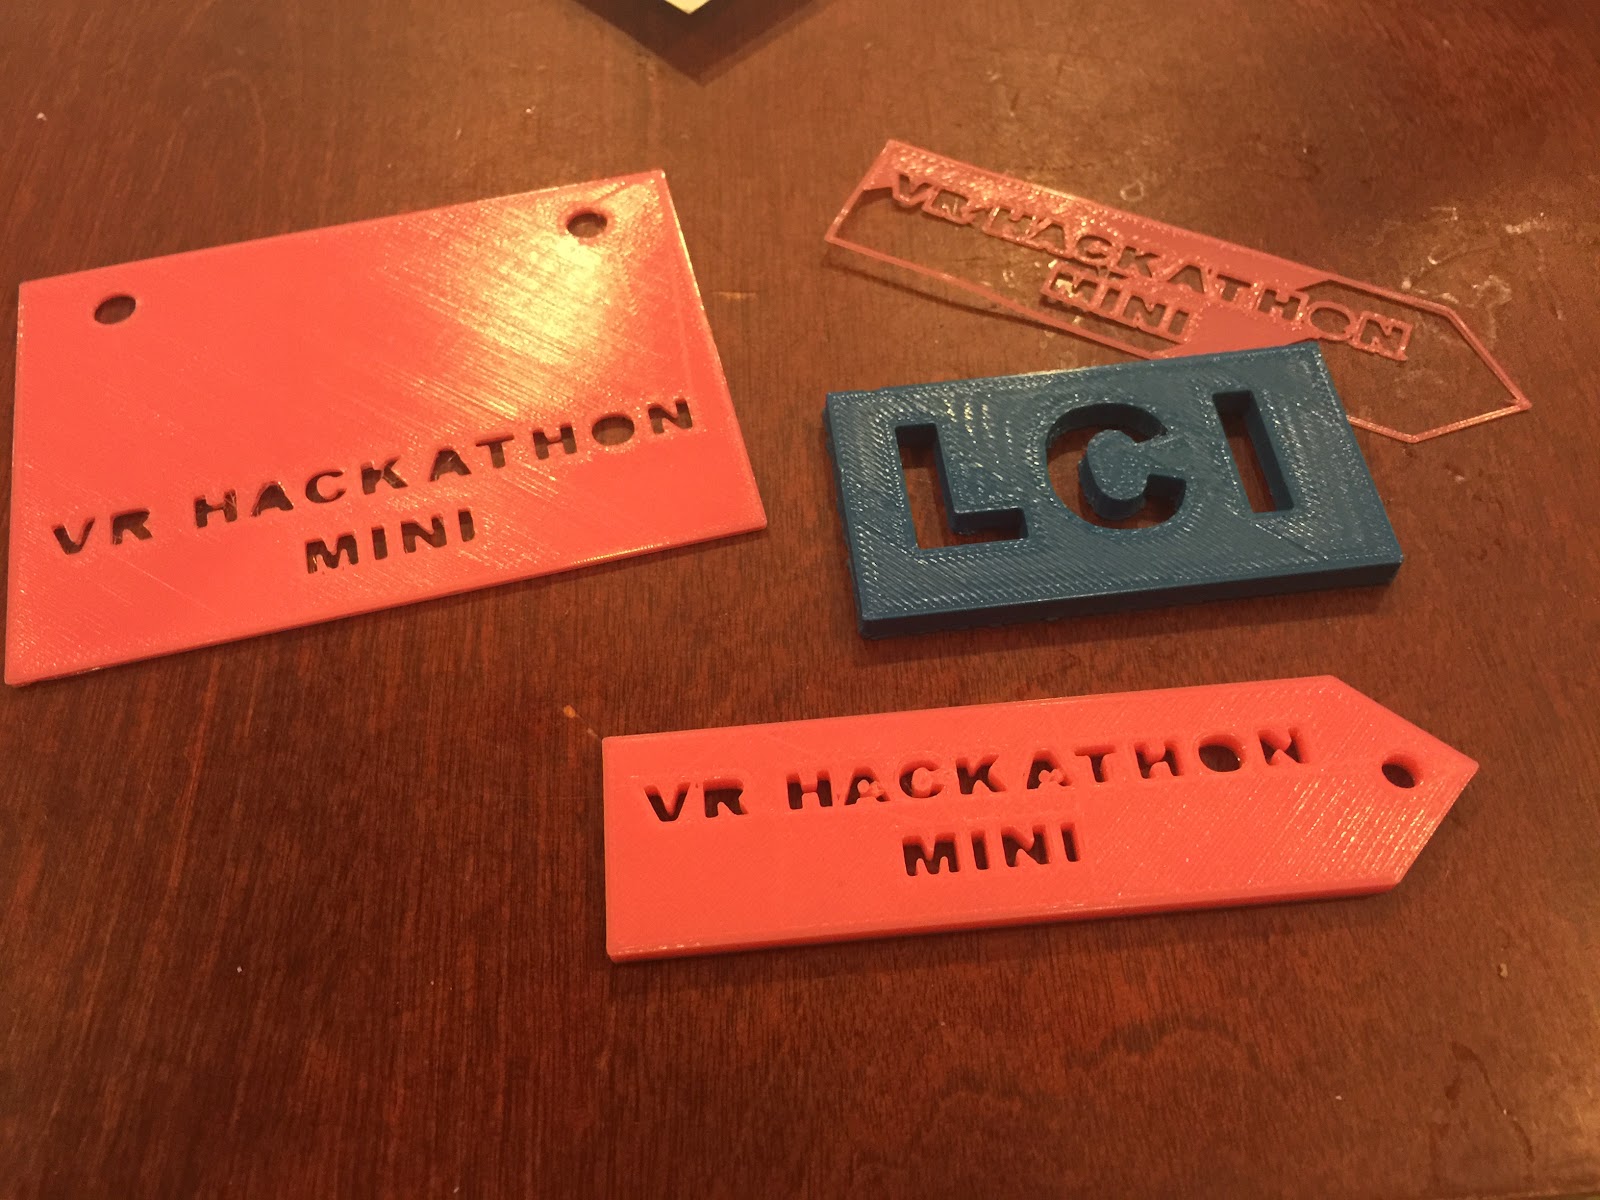
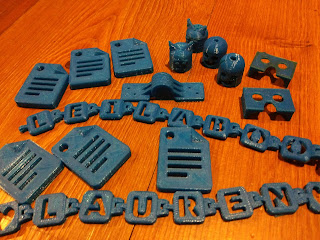
I've printed about a dozen, mostly small, models and I must say the results are incredibly good. When I tweaked the slicer settings to my liking - such as improve the quality (reduce the layer height from 0.32 to 0.2), the results were impressive and consistent. I even tried to print the small, challenging interlocking "Alpha-let" bracelet links, which require good, small precision for the interlocking design to work - and it printed 9 links at a time with perfect results. The prints from this printer required even less cleanup than my TAZ4 (which everyone knows I love).

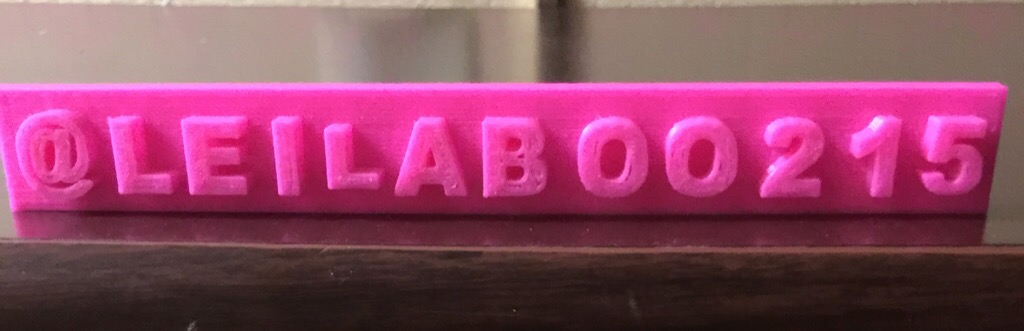
Since I only had blue 1.75mm filament), I printed one of my favorite blue models - the Google Docs icon I designed very early in my 3D Printing life. I printed one alone, which came out perfect. I tried to print 6 at a time, and again, all 6 came out perfect.

The best test was my own 3D Hinge design. This one is challenging, as it prints both sides of the connected hinge in one run with only 0.4 - 0.5mm between the moving parts - giving lots of opportunity for unwanted binding of the moving parts. There was definitely some unwanted binding in this print - but with a little cajoling and loosening the intended gaps with the clam knife (my favorite 3D Printing tool), the hinge loosened and worked like a charm.


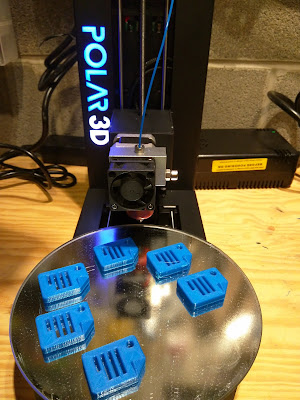
Some early models printed on the Polar3D. All Blue ;-/

Summary

The Polar3D printer is unique in ways which make it very desirable - not just novel. The narrow footprint, simplicity of the hardware, quality print results and robust web-based printing control software all top my list of positives. Of course, the price point - $599 for educators and $799 retail - make it truly a reasonably priced printer for schools and others. Seeing 15 of these printers cranking away making models all night and day at the ISTE education conference gave me initial confidence that this printer was for real - and trying it on my own so far has proven the reliability (albeit early) beyond a doubt. If it turns out that I can actually print multiple filament types - like Ninja-Flex - through this one extruder... wow, that'll really be a bonus!

On the downside.... uh... well.... the build volume could of course be bigger and the power supply transformer could be slightly quieter. Of course there are also small things I might recommend be changed in the software design (if I stretch), but overall, it's incredible how much this small company has already achieved and provided in this printer.

While only having used this printer myself for about 10 days, so far, I highly recommend it. I'm excited about how the unique radial design has simplified the mechanics and how the web-based printing control truly makes life easier (well, for 3D printing, not life in general ;).

Jul 5, 2015

A Girl's Introduction to #3DPrinting (guest post)

This is a guest post from Leila - the daughter of two awesome educators (@iwearthecrowns and @mr_isaacs) who is going into 7th grade. Here's her Bio in her own words: 
Hi my name is Leila(boo215) and I LOVE 3D printing!!! I am so happy that my school has a 3D printer and that the teachers are so nice to me! Also I love that so many kids can connect through maker clubs and 3D printing. I'm an all star cheerleader and did ski club and running with my school this year, and just a little fun fact, I ran two 5K's in two weekends! I am going to run cross country next year for my school!


Hi, my name is Leila and my parents made me go to the VR mini hackathon at the Bergen makerspace a few weeks ago. I didn't want to go for the whole day because it was too early so I went for the afternoon... where I then discovered tinkercad. The mentors all had a really cool name tag that I HAD to learn more about, here is what they looked like(the square on the left).

I wanted to know how they made them and one of the mentors showed me the 3D printers. The students got the key chains(to the right). We had issues for taking my blue one off that I made because the letters were holes and it got stuck on the base, where the 3D prints are printed. 

Once I found Tinkercad which is a 3D design tool, I went right into making my whole family's Twitter handles - you can see how they looked in the pictures here.

I was a part of the AVON39 Youth Crew - a walk to end breast cancer - and because of how excited I was to be able to use the 3D printers, I went right into designing this design on Tinkercad.

I made them overnight at my school but they sadly got messed up, so luckily, the teachers of that classroom were so nice to redo the prints!