Watch the video (embedded above) for a 3 minute lesson on how to do this - and read on for some details.
Use Google Drawings - or Google Slides - to create SVG
If you create a drawing in Google Drawings or Google Slides, you can export an SVG format of that drawing for use in a 3D Modeling app! While Drawings and Slides don't have all the pro tools some experts might expect in a product like Adobe Illustrator, they are much easier to use and allow for something that I've found to be quite handy - that is, tracing an image to create the beginnings of a 3D Model. Go to Google Drive and click the NEW button (it's a CREATE button if you're still using the old Drive interface) and then select Google Drawing, which might be under "more" if you don't use it often. That will take you to a blank page to start your drawing.Trace an image to create SVG
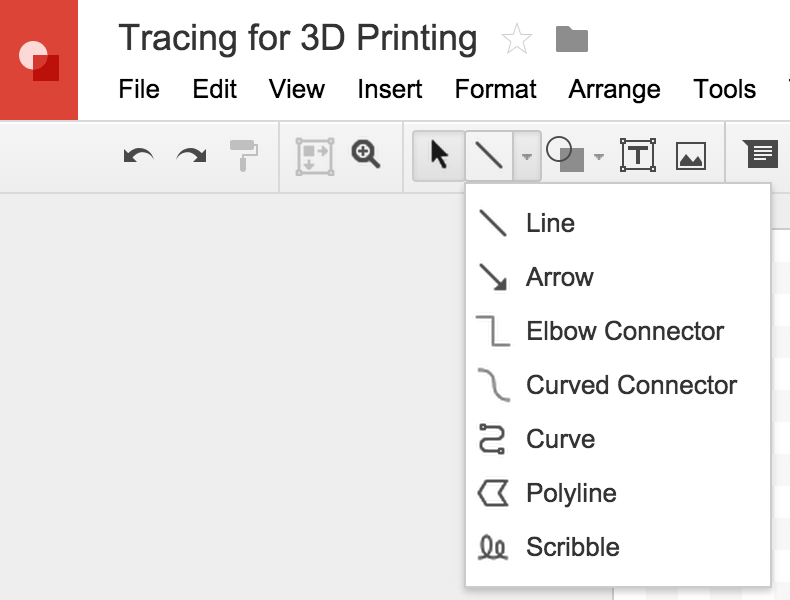 To trace an image as the basis for your eventual 3D model - use the INSERT / IMAGE feature to grab the image you want to trace. Of course, you could just draw using the shape and drawing tools, but if that's all you wanted, you may as well have started in your 3D modeling app. Once the image is there on your canvas, scale it to a workable size. Now, use the line tools to trace it. I like the Curve and Polyline tools for this. Just start at any point on the edge of the object you are tracing and click as you form lines until you can create a closed shape around the object. Use ESCape to end or stop if you make mistakes. When you are done tracing, click off the trace and click the underlying image and delete it.
Download as SVG.
In the FILE menu of Google Drawings is the "DOWNLOAD AS..." option. Use that and select "Scalable Vector Graphics (.svg)" option. That will download the file to your machine - usually into the "downloads" directory.Import the SVG file into your 3D Modeling App
Depending on what 3D modeling app you use, there will be some "IMPORT" or "OPEN" command which will ask you to pick the file to upload. Navigate to the directory which contains the .svg file you saved and import it. From there, you should know how to "extrude" that into an object in your 3D modeling app. I use Autodesk 123D Designer mostly, and this process is extremely easy.
Watch the video in this post to see the whole process.
Thanks for sharing : )
ReplyDeleteSuper cool idea!
Will try it tomorrow morning.
Beyond a grayscale version, I like to also provide clients with a true single color version, using only black and negative space. This would be a little tricky with the logo above, but definitely possible. nice logo
ReplyDeleteI'm to lazy to create and edit photos by my own, nowadays there are a lot of free websites where you can download stock images and photos for commercial or non-commercial use for free. For example, I often use http://www.cannypic.com/ this is proven storage with a lot of quality images.
ReplyDeleteInformative post. Thanks for sharing.
ReplyDeleteNon woven bag machine
noice
ReplyDelete